
Whitelisting our delivery IP’s or domains will help delivery to your own email addresses, but has no effect on delivering to external email addresses.
Sender Policy Framework (SPF) records are a basic/legacy method of authentication. But adding a DKIM record to your DNS is the best way forward. It is much more effective and automatically adds an SPF record as well.
DomainKeys Identified Mail (DKIM) is a way to authorize Email Service Providers (ESPs) to send email on your or your company’s behalf. It allows a sender to take responsibility for their email, and is used to help separate legitimate email from spam and phishing campaigns.
To authenticate using DKIM, you will need:
- your own domain name
- access to your domain’s DNS records
- familiarity with modifying DNS records.
Authenticate your domain
To manage authentication for your domain:
- Click Account Settings.
- In the right sidebar, click Authentication Settings.
- Click Add a sending domain.
- Enter a fully qualified domain name to authenticate. Authenticating just the base domain name will not authenticate subdomains. For example, authenticating designco.com will not authenticate mail.designco.com.
- Click Generate DNS records.
- The next page will show the “TXT Name” and “TXT Value” details that you will need to add to your domain’s DNS records. How to do this varies depending on the service you use to manage your DNS.
- After you’ve added the record to your domain host, in Campaign Monitor click I’ve added the record, please verify it. It can take time for DNS record changes to update around the internet, so if our servers don’t see the changes right away, try again later.
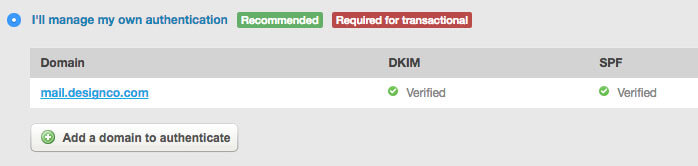
- After everything has been set up correctly, the authenticated domain will be listed on the Client Settings > Authentication Settings page, as shown below:
NOTE: Some DNS hosts do not support semicolons ( ; ) or underscores ( _ ), which are required to authenticate with Campaign Monitor. In some cases you can work around semicolons by replacing any occurrences of ;with \;. If this doesn’t work, or your host doesn’t support underscores, you will need to switch DNS providers to authenticate your email.
The next time you send an email campaign, you will be able to select the authenticated domain for the sender’s “From” address:
